
MAGAZINE
How to use heatmaps to track user behaviour
What is a Heatmap tool?
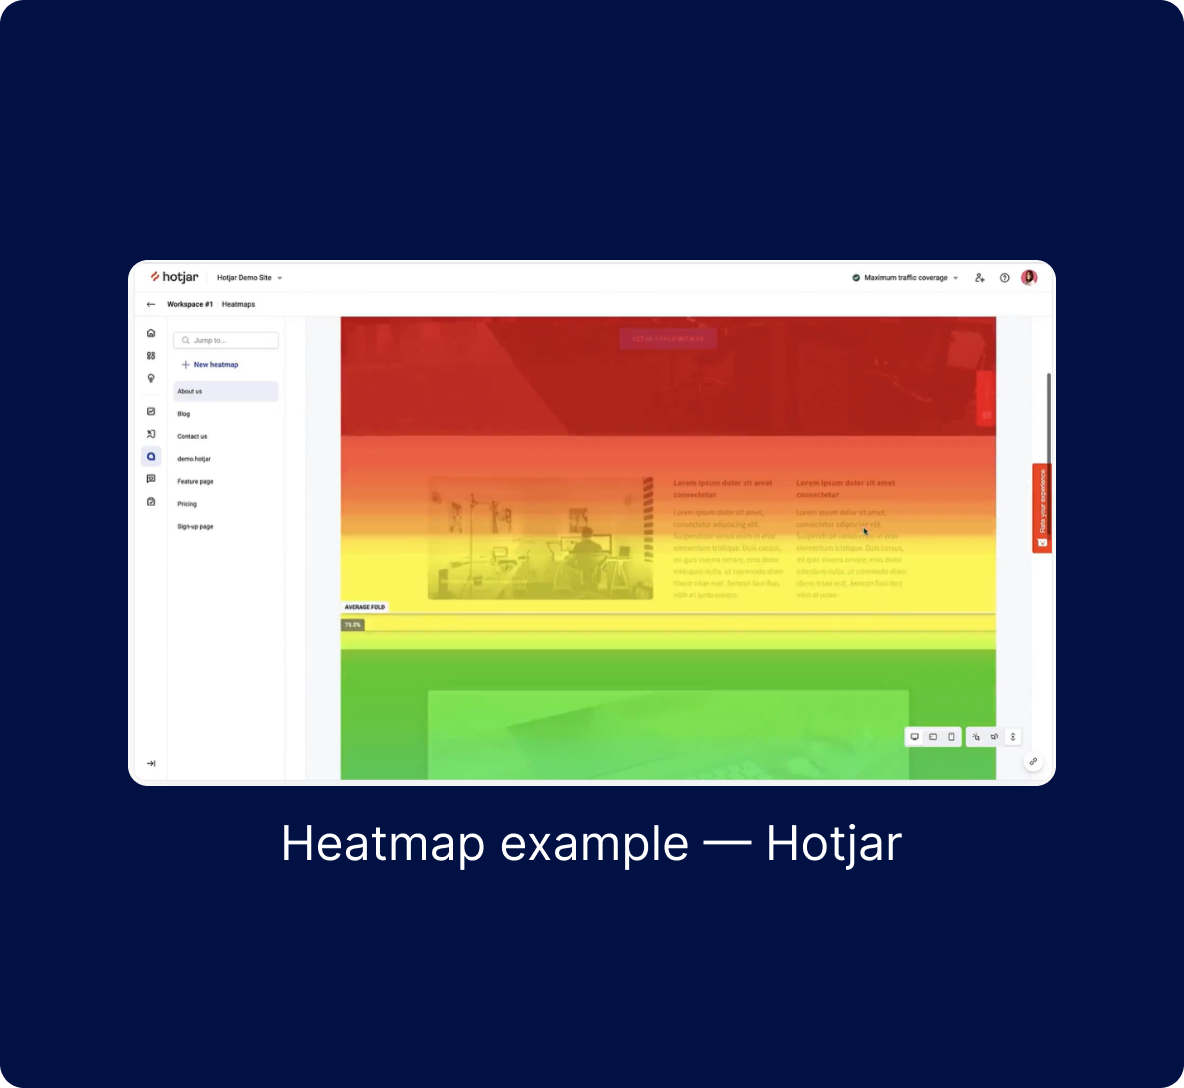
A heatmap tool, like Hotjar (optional), helps you understand how visitors interact with your website.
Tools like Hotjar, Crazy Egg, or Mouseflow visually show where users are clicking, scrolling, and spending the most time.
This insight is valuable for improving your website’s design and user experience. In our example, we'll be using Hotjar, but feel free to explore other options as well.
Why use Hotjar?
Imagine being able to see exactly how your visitors use your site, like watching over their shoulder as they navigate. This information can help you identify what’s working well and what needs improvement, making it easier to enhance your website and boost user satisfaction.
In short, Hotjar helps you understand your users better, so you can create a website that meets their needs and keeps them coming back.
Step 1. Get your Hotjar tracking code
Note: All of these actions are completed within the Hotjar application, so make sure you stay logged in throughout the process.
1.1. Sign up
Start by heading to the Hotjar website (www.hotjar.com).

If you don’t have an account, click on "Get started" and follow the instructions to create one.
You’ll need to provide your email address and set a password.
1.2. Create a new site
Once logged in, you’ll be taken to the Hotjar dashboard.
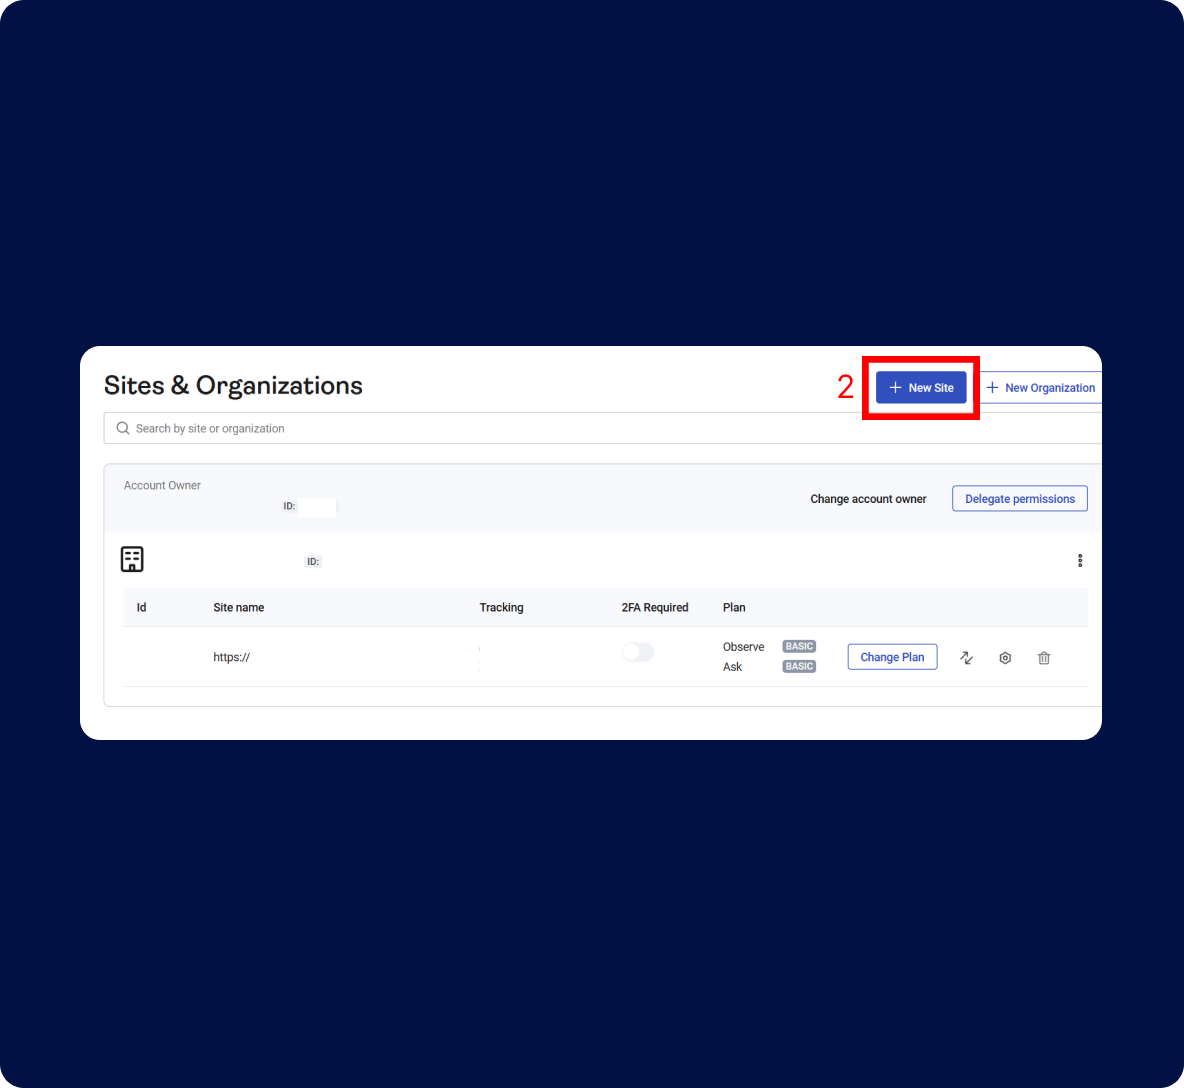
Here, you’ll need to set up a new site for tracking. Go to Sites & Organizations - Hotjar (https://insights.hotjar.com/site/list)
Click on "+ New Site" and enter your website's name and URL.
This step is essential because Hotjar uses this information to generate a tracking code unique to your site.
1.3 Get the tracking code
After you’ve added your site, Hotjar will automatically generate a tracking code.
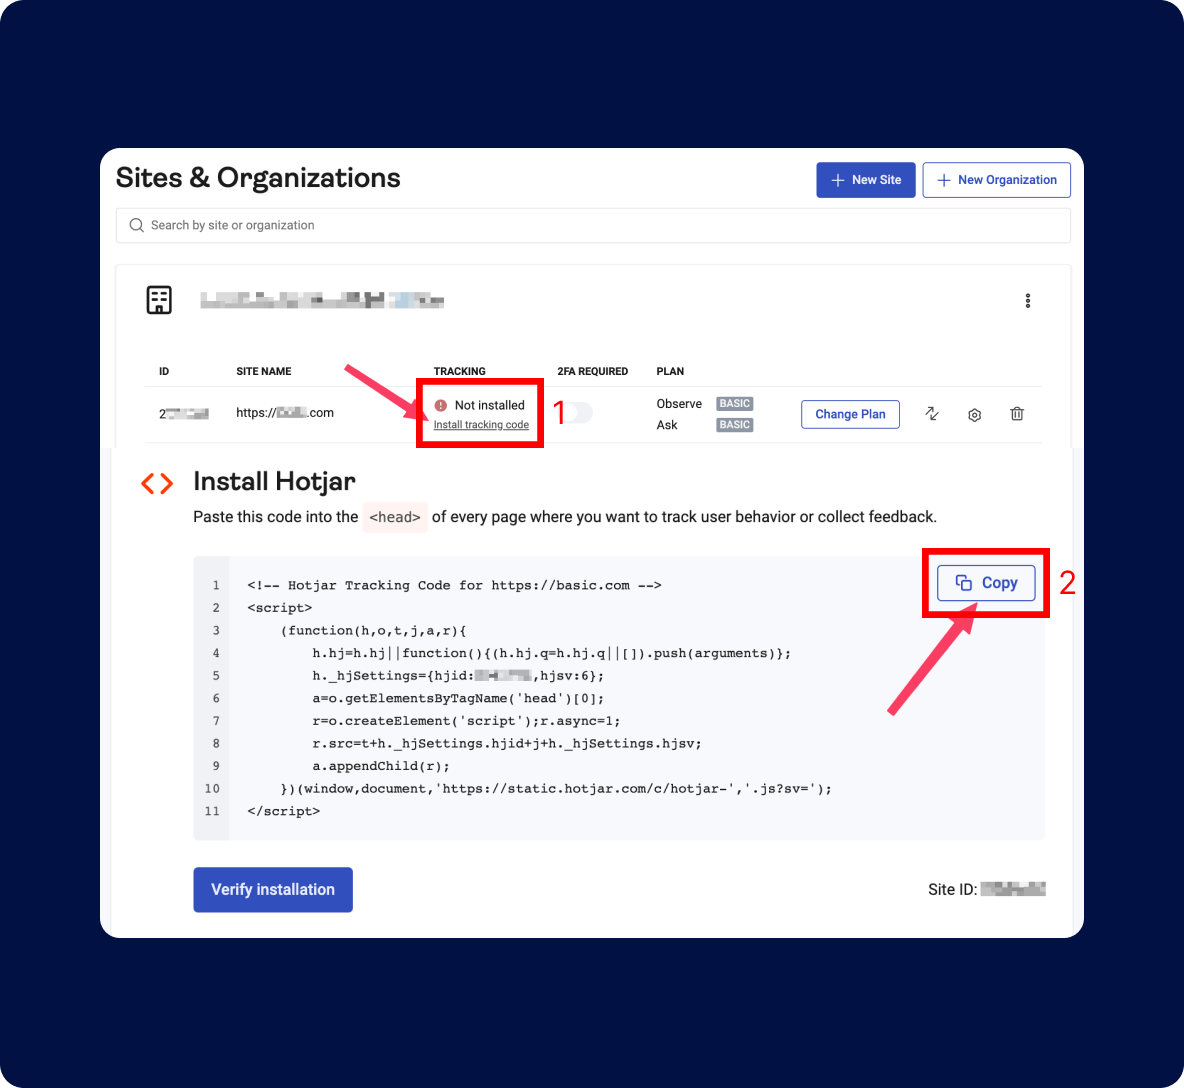
You’ll see a button labeled "Copy". Click on this button to copy the entire code.
This is the code you’ll need to paste into your Kreors project later.
If you ever need to retrieve the code again, go to the "Sites & Organizations" section in Hotjar, find your site, and click on "Install tracking code." Then, click "Copy to Clipboard" to copy the code.
Step 2. Access your Kreors project settings
Note: At this stage, you should now be working within your Kreors application. Ensure you're in the correct project before proceeding with adding the tracking code.
2.1 Log in to Kreors and paste the Hotjar tracking code
Open your web browser and log in to your Kreors account.
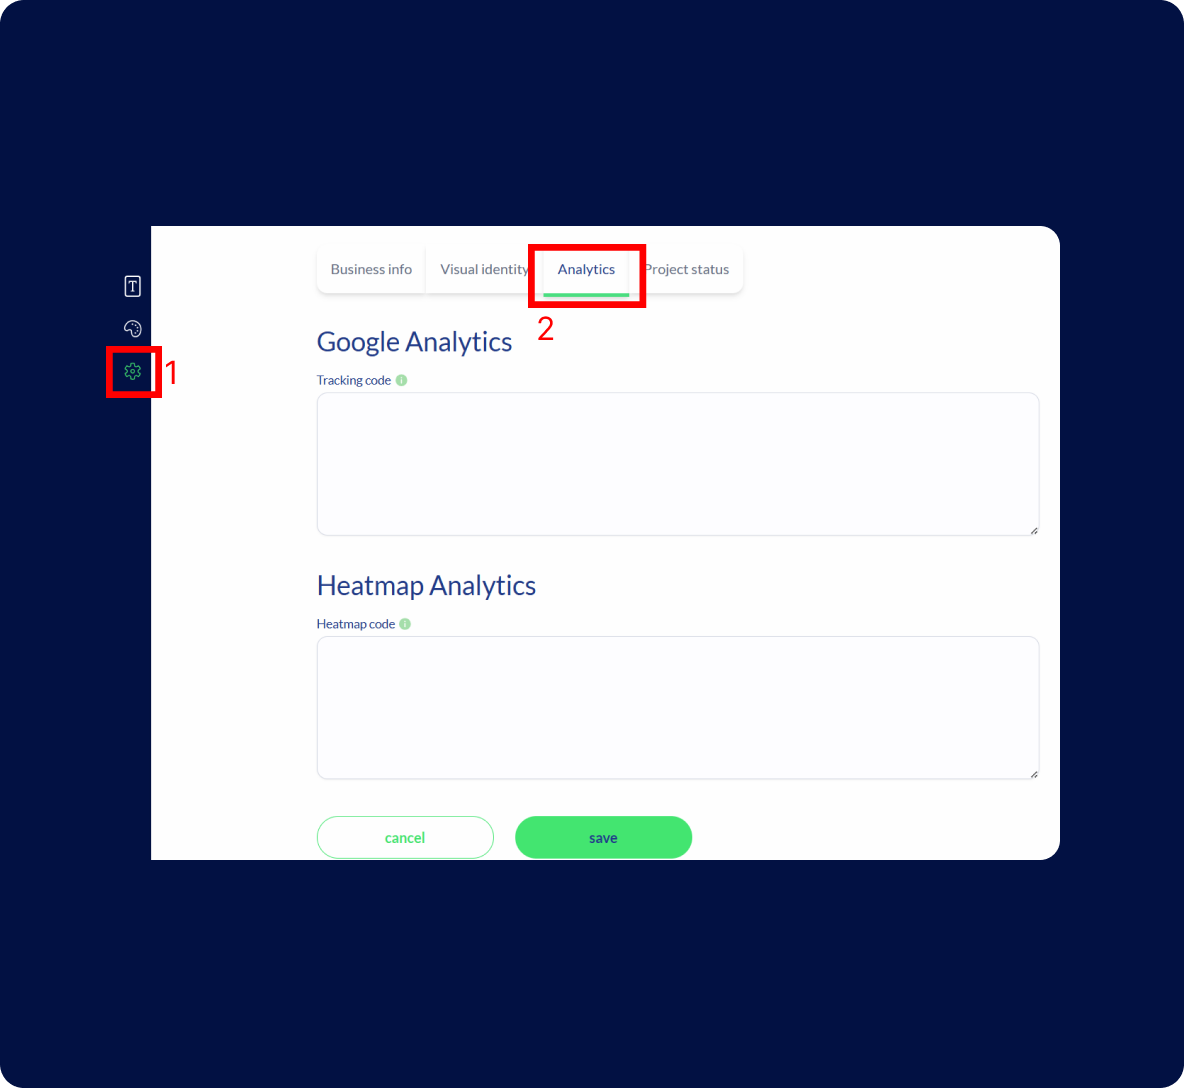
Navigate to settings:
In the project settings, look for the "Analytics" section. This is where you can add custom tracking codes, such as the one from Hotjar.
Paste the Hotjar tracking code that you copied earlier into this field. Be sure not to alter the code, as this could affect its functionality.
Your vision is our mission. We prioritize understanding your needs to deliver customized services that perfectly align with your objectives.
Save your changes:
After pasting the code, make sure to save your changes. This step finalizes the integration, allowing Hotjar to start collecting data from your website.
Step 3. Verify installation
Note: All of these actions are completed within the Hotjar application, so make sure you stay logged in throughout the process.
3.1 Go back to Hotjar
3.2 Automatic verification
3.3 Start viewing data
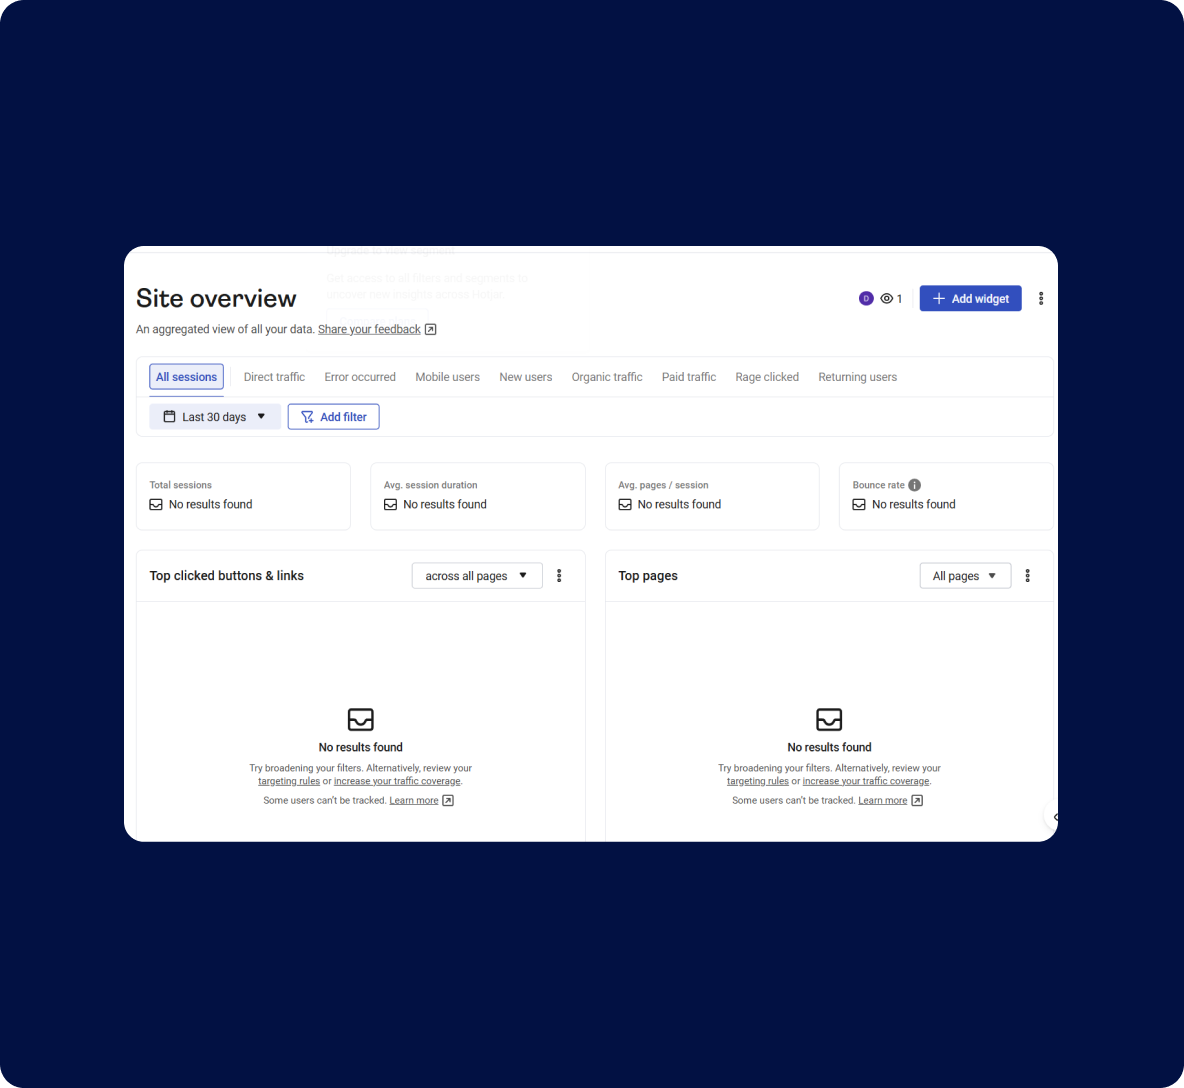
Once verified, you’ll start seeing real-time user data on your Hotjar dashboard. This data includes heatmaps, recordings, and more, giving you valuable insights into how users interact with your site.
Why use Hotjar with Kreors?
Integrating Hotjar with your Kreors site is a game-changer. It allows you to gather in-depth insights into user behavior, helping you make informed decisions that improve your website’s performance.
From seeing which parts of your site get the most attention to identifying where users drop off, Hotjar gives you a clear picture of what’s working and what isn’t.
By following these simple steps, you’ll unlock a wealth of information that can guide your website improvements, making your Kreors project more user-friendly and effective. Happy tracking! 🚀
Quick tips: What to monitor in Hotjar?
To get the most out of Hotjar, here are two key things you should start monitoring:
Click Heatmaps:
Scroll depth:
Visitor recordings:
Conversion funnels:
TAKE THE FIRST STEP
Express yourself and create something meaningful and authentic.