
MAGAZINE
How to set up Google Analytics in Kreors
Why is Google Analytics important for your website?
Google Analytics is like having a backstage pass to your own website. It shows you exactly what’s happening—who’s visiting, what they’re looking at, and how they found you. This info is crucial because it helps you make your website better.
Imagine trying to improve your site without knowing what your visitors like or where they come from. It would be like trying to fix something in the dark. Google Analytics turns on the lights.
With this tool, you can:
Step 1. Create a Google Analytics account
Note: All of these steps need to be completed on the Google Analytics website (www.analytics.google.com/analytics/web).
1.1 Go to Google Analytics

Go to the Google Analytics website and click "Get started today" button in the top right corner.
Use your Google or Gmail account to sign in. If you don’t have one, you can create it here.
1.2 Create your Google Analytics account
This is where your website’s data will be stored.
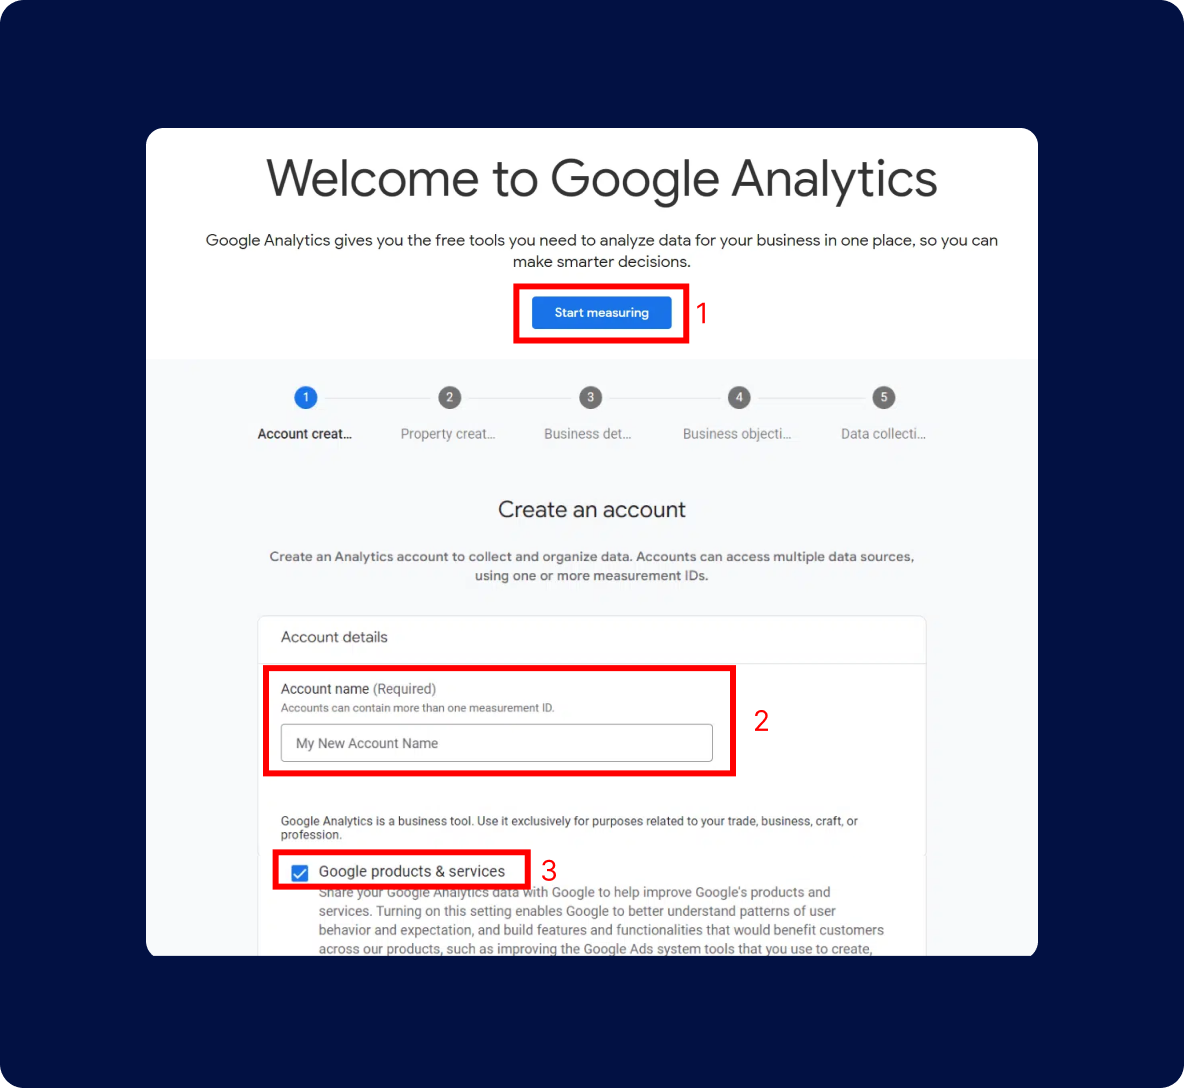
Start measuring
Look for a button that says “Start measuring” and click on it to begin.
Name your account
You'll need to give your Google Analytics account a name—this is usually just the name of your website. You’ll also see some options for data sharing. Take a moment to review these, then click “Next.”
1.3 Create property
To set up Google Analytics correctly, you will need to enter the property details of your website.
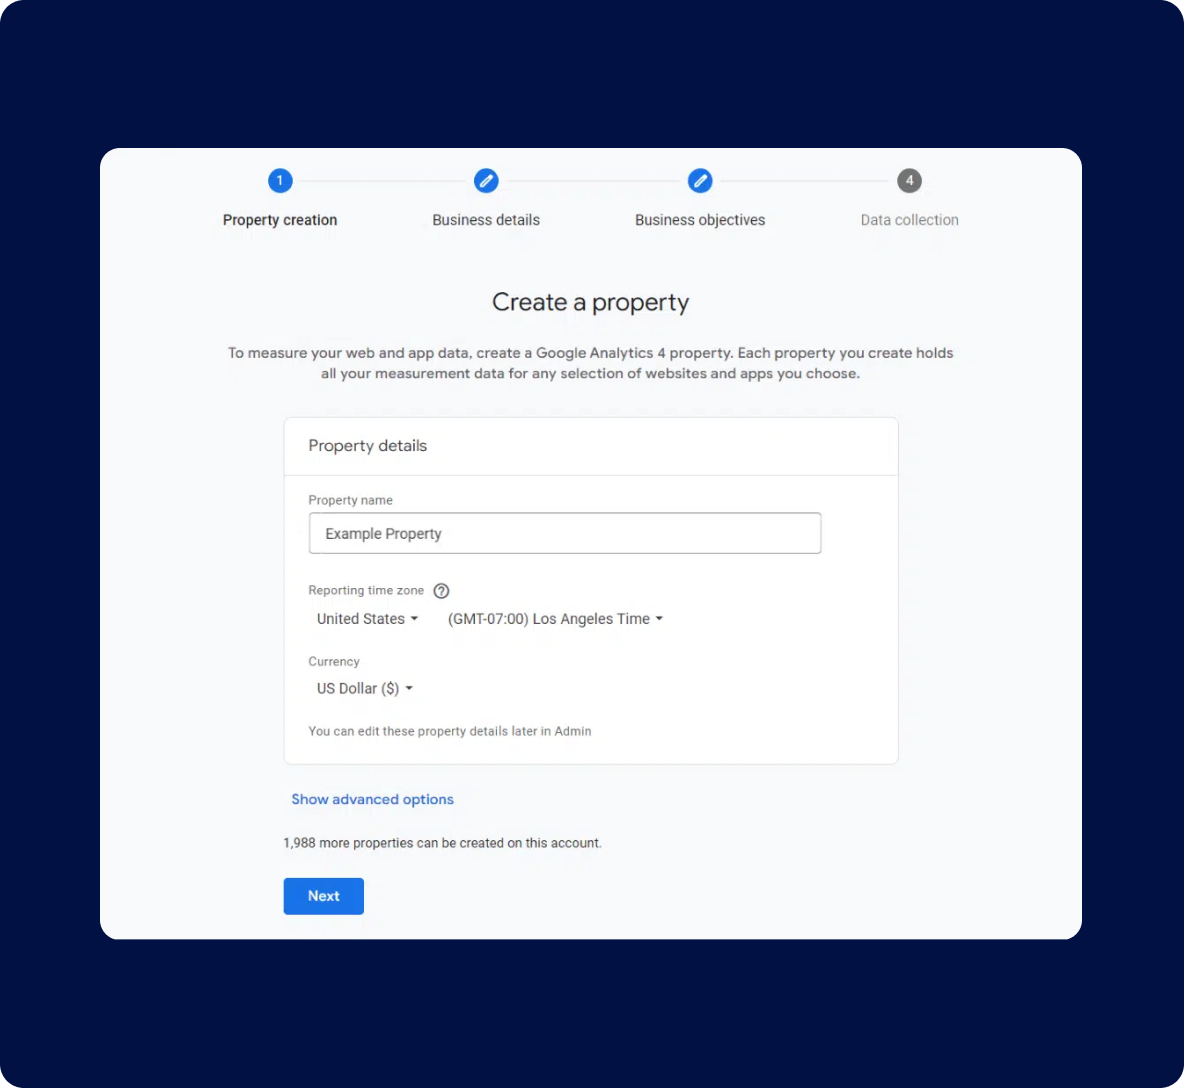
Property name
Name this after your website.
Time zone
Pick the time zone where your website operates.
Currency
Choose the currency you want to use for tracking.
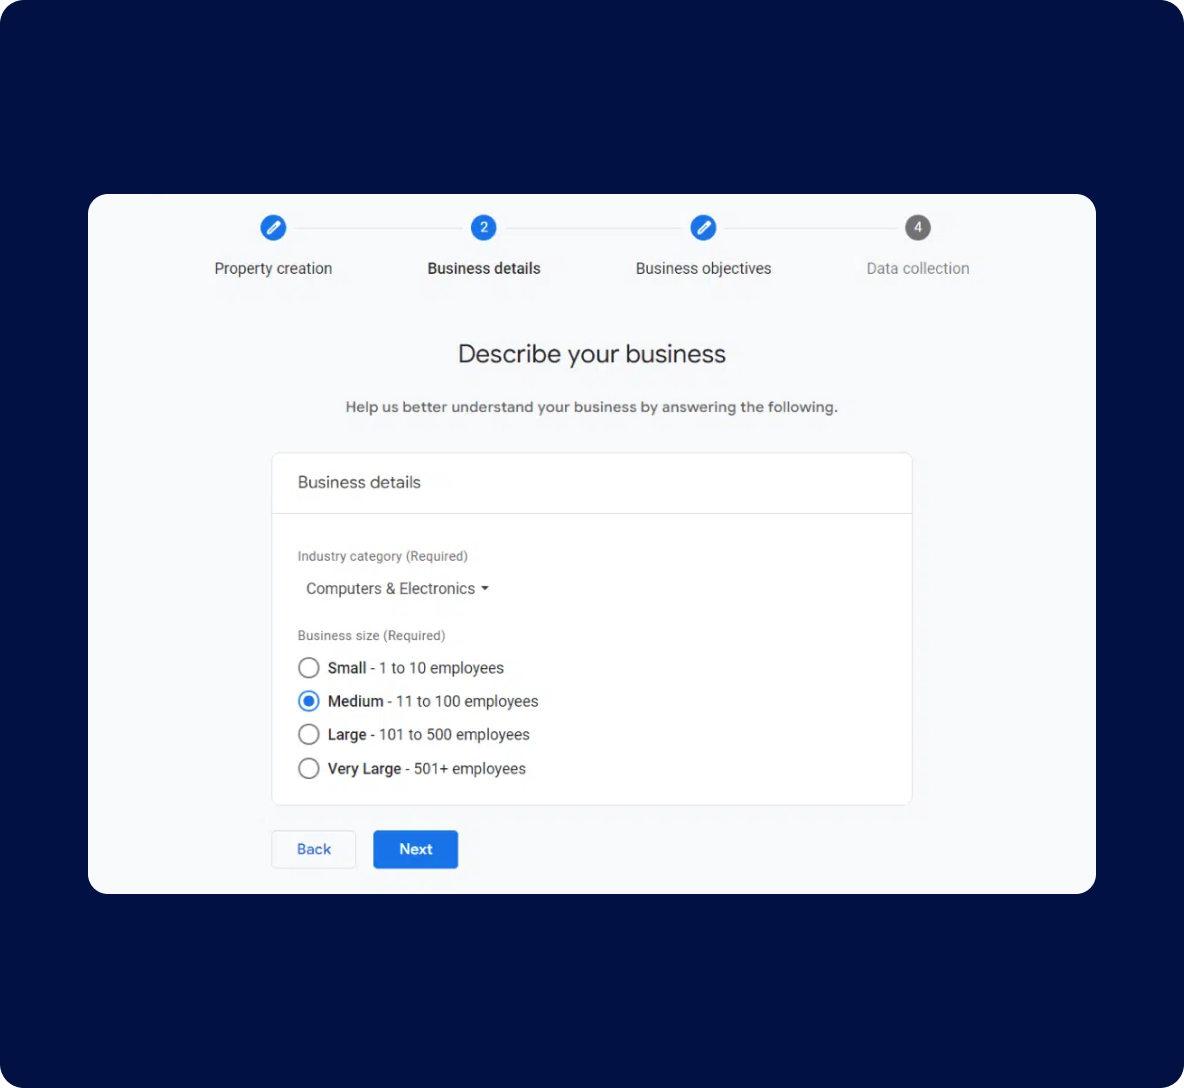
1.4 Set business info
Select your industry category (like “Retail” or “Blogging”) and the size of your business. Then, click “Next.”
1.5 Set your goals
Choose what you want to achieve with Google Analytics.
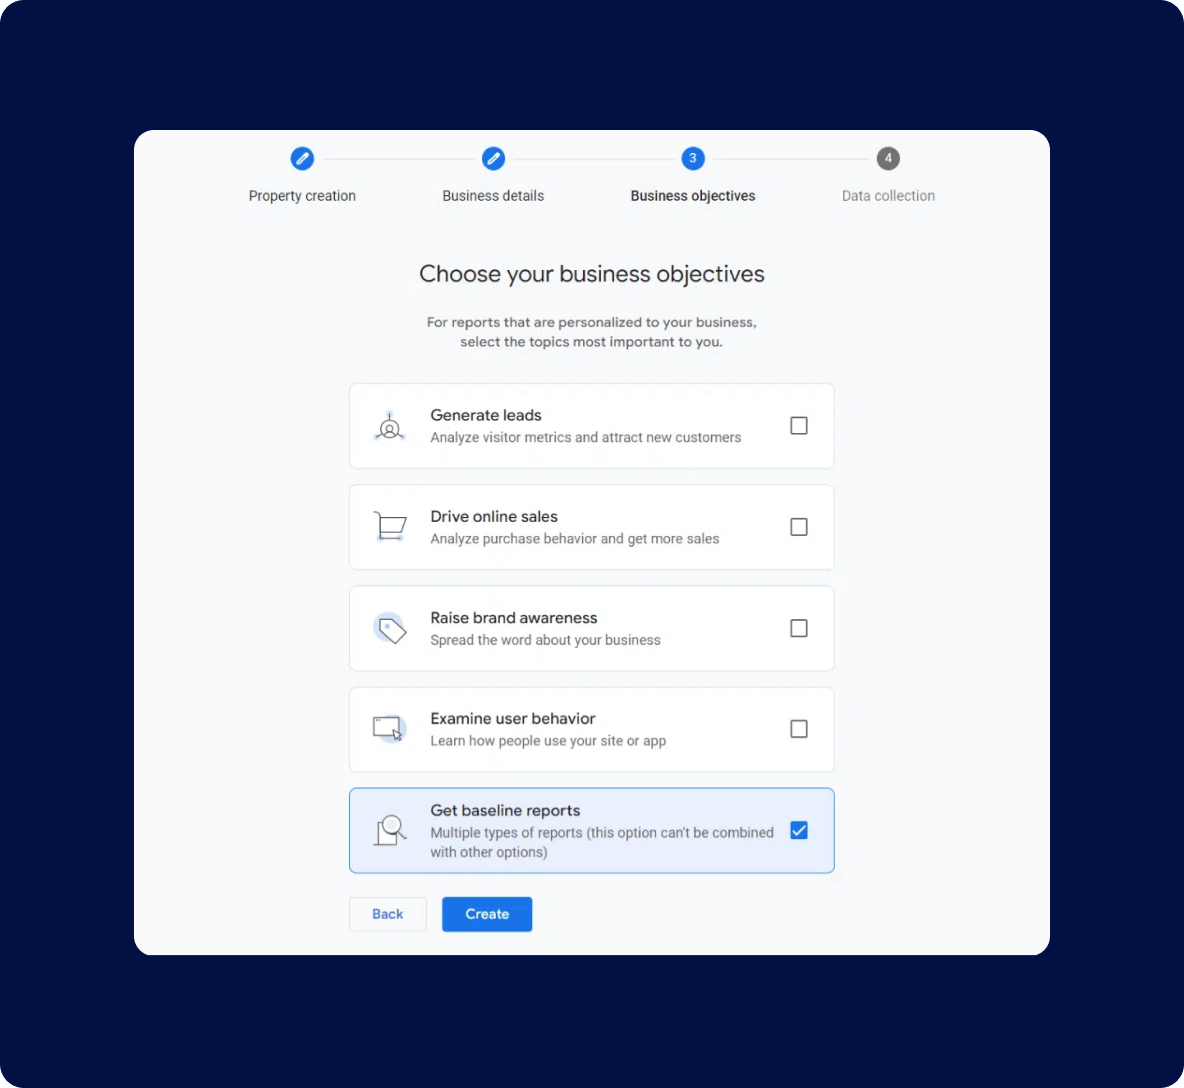
You should choose “Get baseline reports” to get all the Google Analytics data and reports in your account.
Finally, click “Create.”
1.6 Create a data stream
At this point, you will see your Google Analytics web stream options.
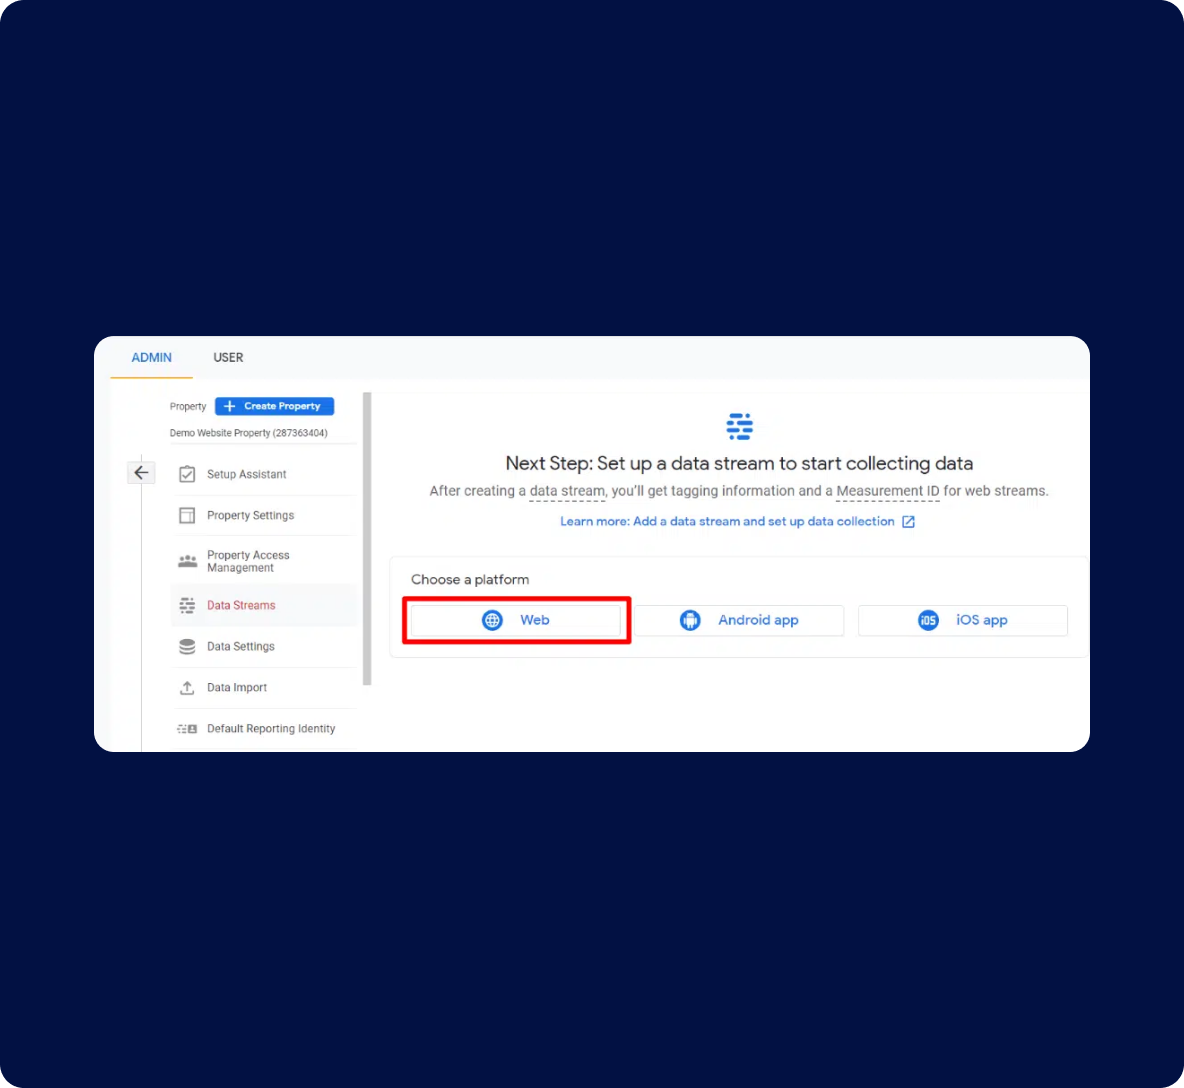
Choose "Web" as your platform, then enter your website’s URL and name. Google Analytics will automatically set up enhanced measurements for tracking.
1.7 Enter your website details
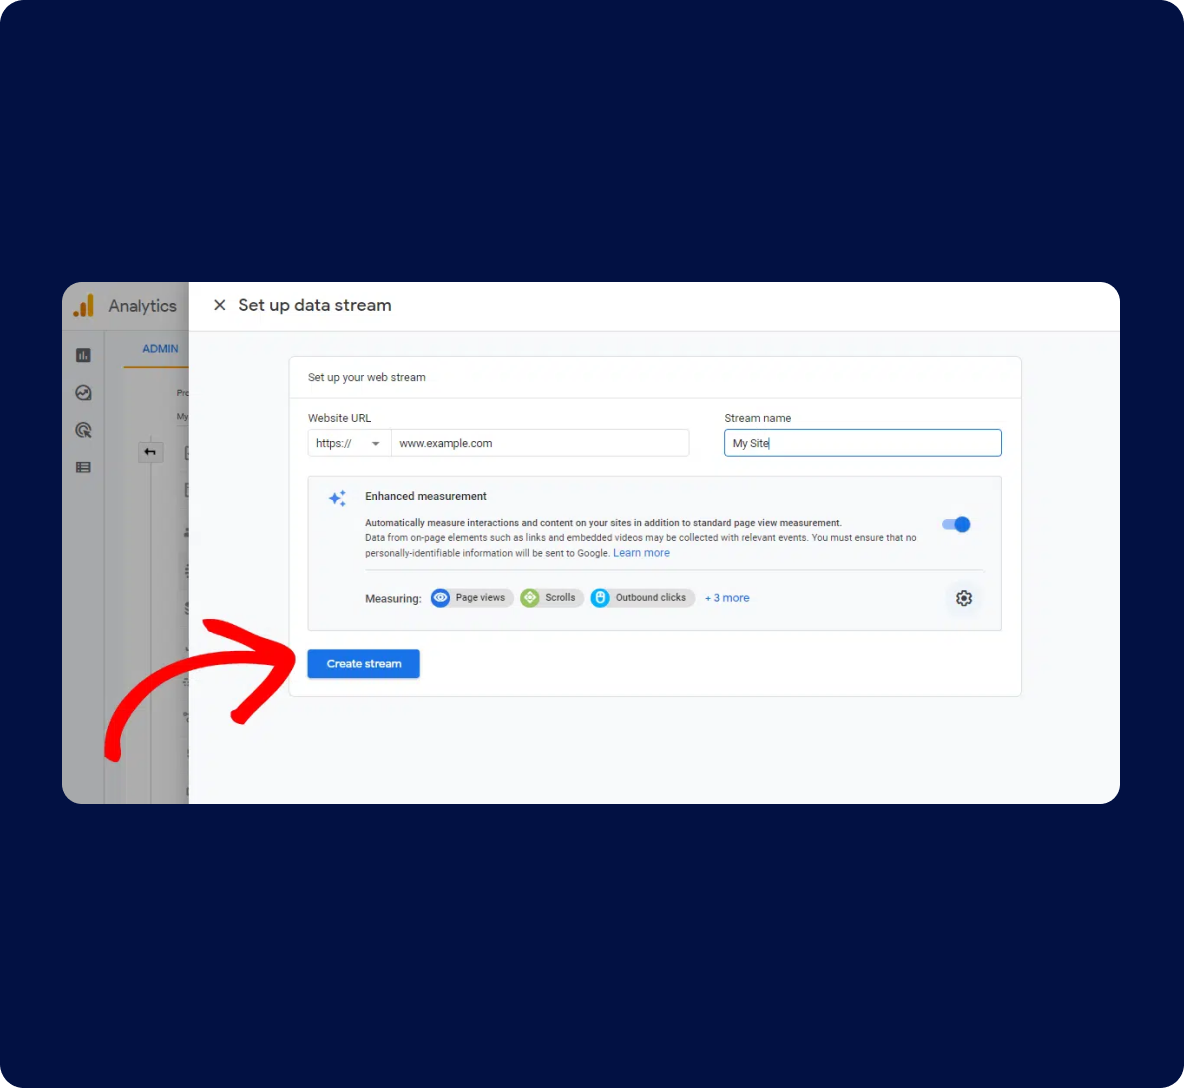
Start by typing in your website’s URL (web address) and give your stream a simple name, like "My Website Stream."
Click the “Create stream” button. This sets up the tracking for your site.
1.8 Get the tracking code
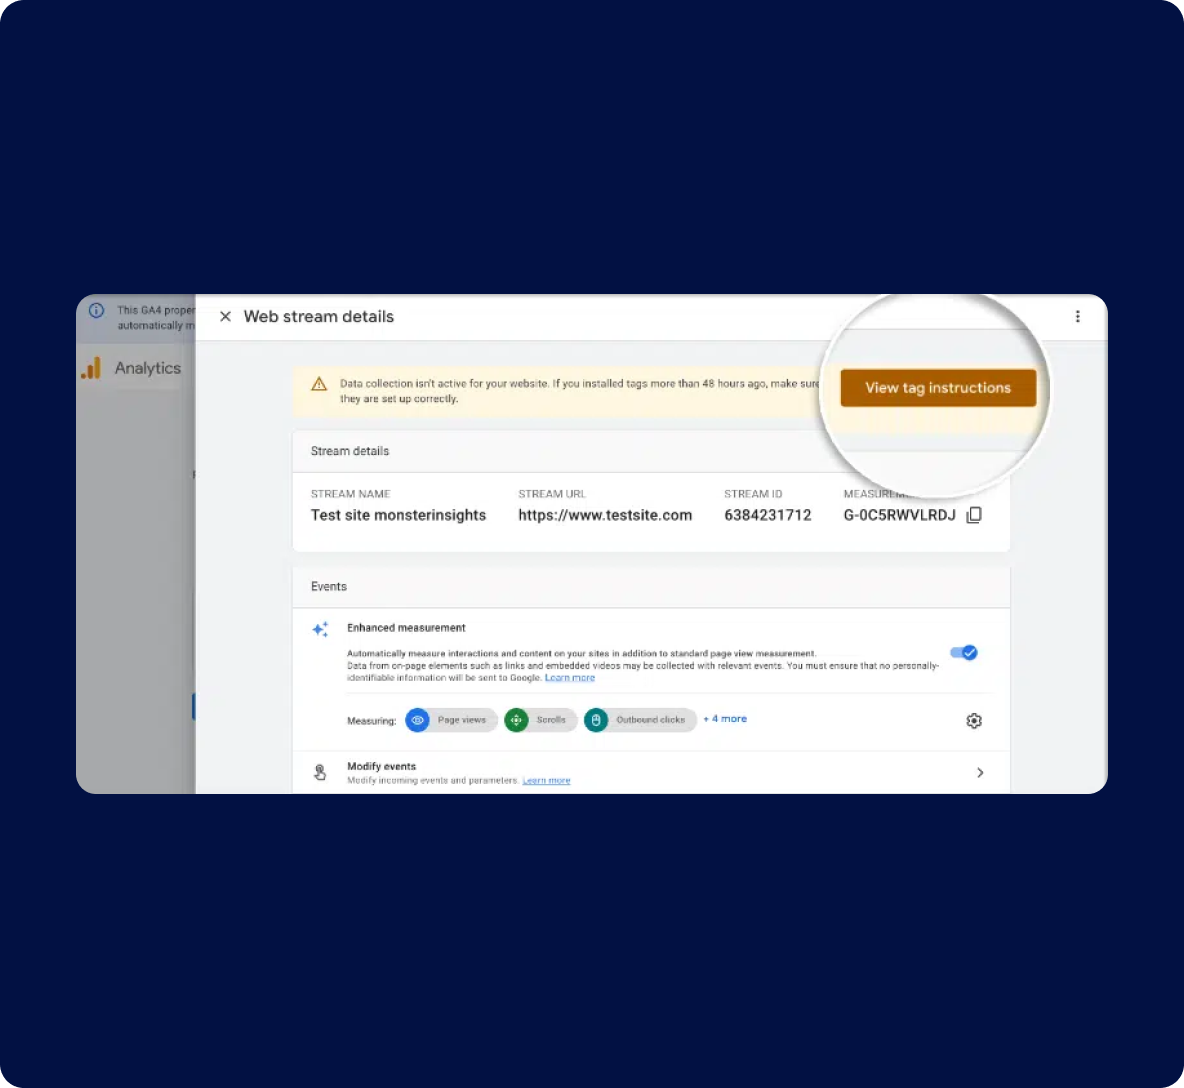
At the top of the page, you will see a bar that shows you how to set up Google Analytics on your website.
Click the View tag instructions button.
1.9 Copy the code
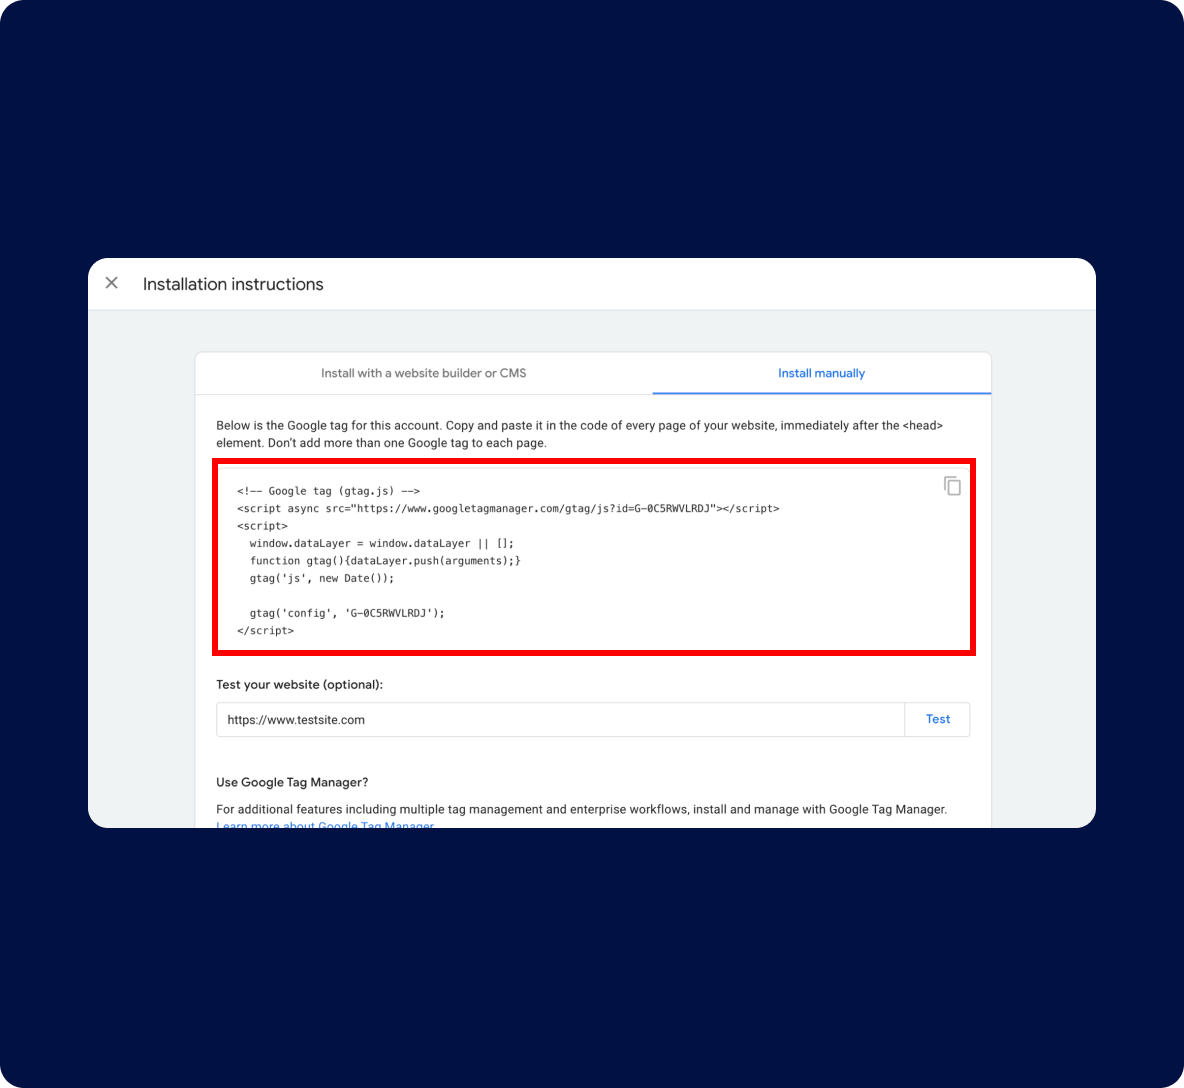
Switch to the “Install manually” tab. From here, you will be able to see your Google Analytics tracking code.
Click icon “Copy” to save the tracking code. Keep it handy—you’ll need it for the next step.
Leave Google Analytics open
Keep the Google Analytics page open so you can easily return to it after adding the code to your website.
Step 2. Add the tracking code to your Kreors project
Note: At this stage, you should now be working within your Kreors application. Ensure you're in the correct project before proceeding with adding the tracking code.
2.1 Log in to Kreors and paste the Google Analytics tracking code
Open your web browser and log in to your Kreors account.
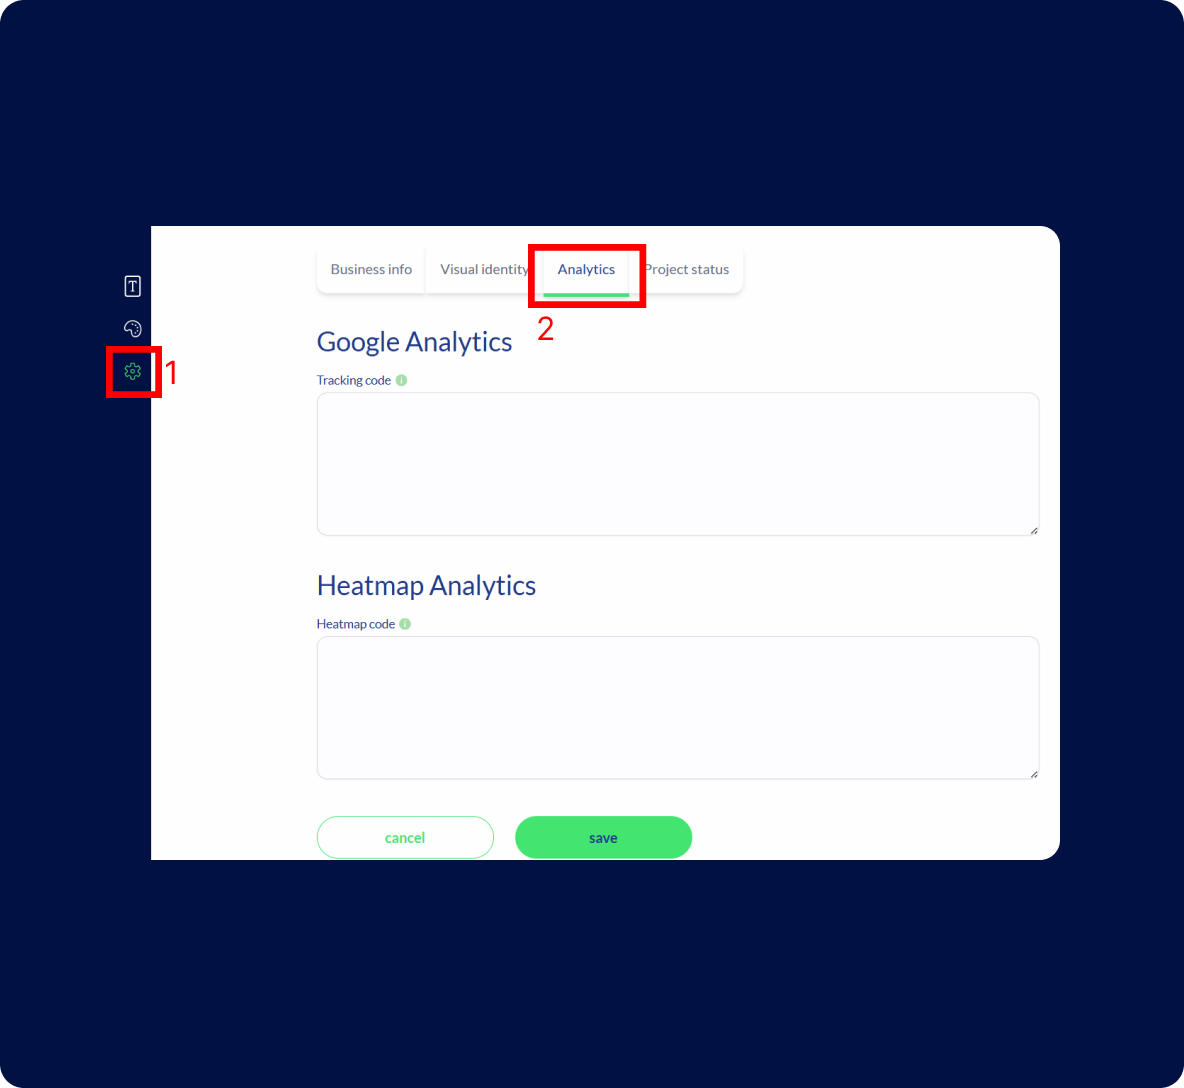
Navigate to settings:
In the project settings, look for the "Analytics" section. This is where you can add custom tracking code from Google Analytics.
Paste the tracking code that you copied earlier into this field. Be sure not to alter the code, as this could affect its functionality.
Save your changes:
After pasting the code, make sure to save your changes. This step finalizes the integration, allowing Google Analytics to start collecting data from your website.
Step 3. Verify installation
Note: All of these actions are completed within the Google Analytics website, so make sure you stay logged in throughout the process.
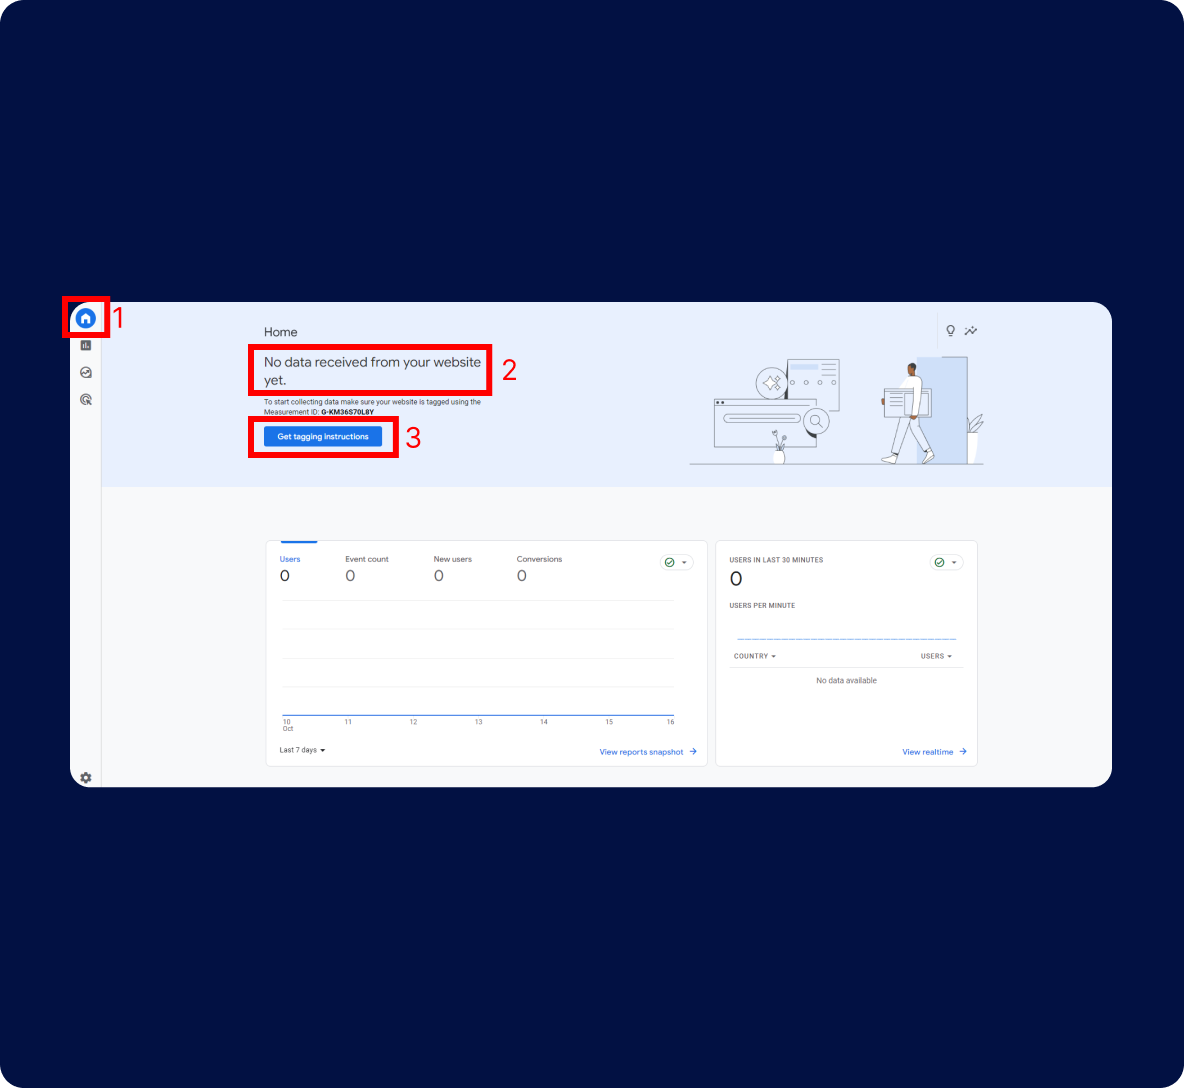
3.1 Wait for data to appear
Give it 15 to 30 minutes after setup. Then, go to your Google Analytics account.

3.2 Check the data streams page
3.3 Be patient
Optional. Troubleshooting
If you still don’t see any data after waiting, double-check that you’ve installed the tracking code correctly. If needed, repeat the steps to ensure everything is set up right.
Why use Google Analytics with Kreors
TAKE THE FIRST STEP
Express yourself and create something meaningful and authentic.